How to test a WebXR app without a headset
Emulate a headset in the browser with IWER: install it, move the headset and controllers from code, use a synthetic room for AR, record a session and replay it.
Michal Takáč 6 min read
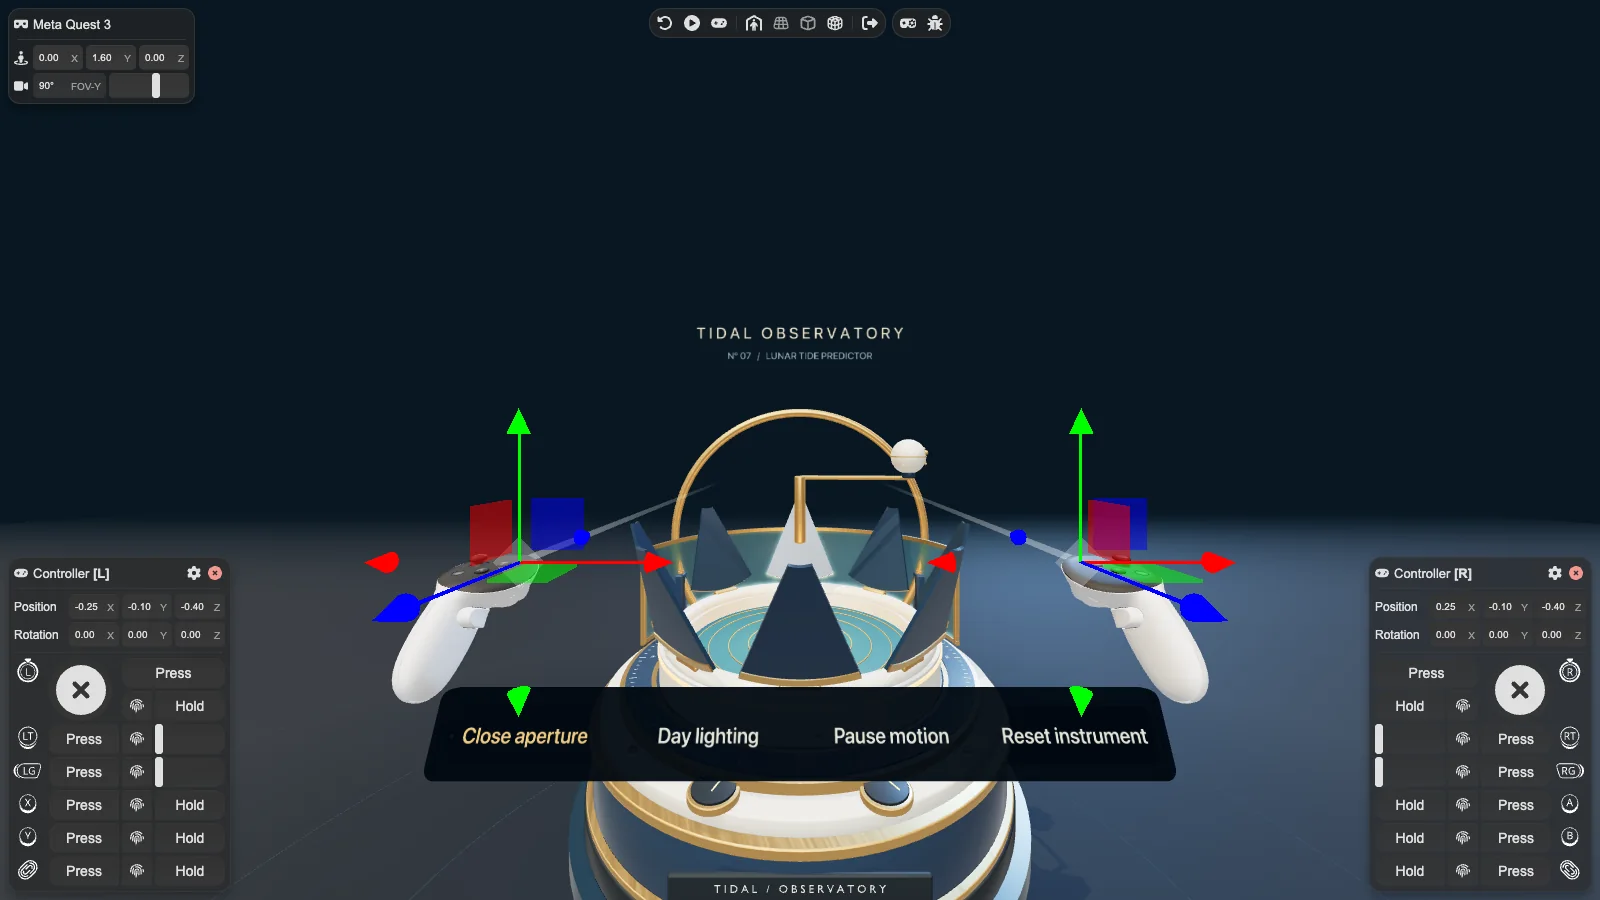
Putting a headset on for every small change is slow. Most of the time you only need to know that the scene starts, that the trigger does what it should, and that nothing broke. An emulated headset in a desktop browser answers those questions in seconds. This guide shows how, and says clearly what emulation cannot tell you.
The short answer
Use IWER or Meta's Immersive Web Emulator to exercise a WebXR session, including headset poses and controller or hand input. Record a representative interaction and replay it after changes, checking the resulting scene. Use the physical headset for tracking, comfort and performance checks.
Desktop orbit controls help inspect a scene, but do not test XR input. Chrome's Sensors panel can simulate orientation and touch; that is different from creating an immersive session with tracked controllers and hit-test surfaces.
Three ways to emulate
- IWER in the page. The Immersive Web Emulation Runtime is a JavaScript library from Meta. It installs a WebXR implementation into the page, so
navigator.xrexists in a browser that has none. You control the emulated device from code. - A browser extension. The Immersive Web Emulator is an extension for Chromium-based browsers that adds an emulated headset to any page. It needs no change to your project, and it is built on IWER.
- The emulator inside @react-three/xr.
createXRStorehas anemulateoption. By default it emulates a Meta Quest 3 when the page is onlocalhostand the browser has no WebXR. It also uses IWER.
The extension is the quickest way to look around by hand. IWER in the page is the one to choose when you want a script, or a test, to drive the headset.
Installing IWER in the page
Create the device and install the runtime before your app asks for a session.
// xr-dev.js
import { XRDevice, metaQuest3 } from 'iwer'

export const xrDevice = new XRDevice(metaQuest3)
xrDevice.installRuntime()
Make desktop emulation an explicit development choice. In this standalone Vite example, add ?emulateXR=1 to the desktop preview address:
// index.jsx, before the app is rendered
if (import.meta.env.DEV && new URLSearchParams(location.search).get('emulateXR') === '1') {
  await import('./xr-dev.js')
}
Leave that parameter off when opening the development page on a physical headset. A development server can be visited by real hardware too; checking only import.meta.env.DEV does not distinguish a laptop from a Quest. IWER's runtime guidance explains that installing its runtime can override native WebXR.
Vite removes this branch from a production build, so the emulator is excluded when this is its only import. Graspable manages its preview runtime itself; this example is for your own Vite project.
If you use @react-three/xr, switch its own emulator off so that two emulators do not compete:
const store = createXRStore({ emulate: false })Driving the headset from code
Once the runtime is installed, the device is an object you can move. Positions are in metres.
// Stand 1.6 m tall at the origin, looking straight ahead.
xrDevice.position.set(0, 1.6, 0)
xrDevice.quaternion.set(0, 0, 0, 1)

// Hold the right controller in front of the chest.
xrDevice.controllers.right.position.set(0.2, 1.3, -0.4)

// Pull the trigger and let go. The app receives selectstart, select and selectend.
xrDevice.controllers.right.updateButtonValue('trigger', 1)
requestAnimationFrame(() => xrDevice.controllers.right.updateButtonValue('trigger', 0))

// Push the left thumbstick forward.
xrDevice.controllers.left.updateAxes('thumbstick', 0, -1)
Hands work the same way:
xrDevice.primaryInputMode = 'hand'
xrDevice.hands.right.position.set(0.2, 1.3, -0.4)
xrDevice.hands.right.updatePinchValue(1)
These calls are described in the IWER getting started guide. The release above waits a frame so that the app sees the press before it sees the release.
On-screen controls and a room for AR
Two add-on packages make the emulator usable by hand and for AR:
import { XRDevice, metaQuest3 } from 'iwer'
import { DevUI } from '@iwer/devui'
import { SyntheticEnvironmentModule } from '@iwer/sem'

export const xrDevice = new XRDevice(metaQuest3)
xrDevice.installRuntime()
xrDevice.installDevUI(DevUI)
xrDevice.installSEM(SyntheticEnvironmentModule)
xrDevice.sem.loadDefaultEnvironment('living_room')
@iwer/devui adds on-screen controls for the headset, controllers and hands. While they are installed they set the device's state on every frame, so drive the device either from the controls or from your own code, not both at once. @iwer/sem puts the emulated headset in a synthetic room with floors, walls and furniture. That matters for AR: without a room there are no surfaces, so hit tests return nothing and plane detection finds no planes. Use those surfaces to test placement logic; they do not reproduce tracking noise or the geometry of the actual room.
Record a session and replay it
Scripting every movement by hand gets tedious. IWER can record what you do in a session and play it back.
import { ActionRecorder } from 'iwer'

// After the session has started:
const refSpace = await session.requestReferenceSpace('local-floor')
const recorder = new ActionRecorder(session, refSpace)

// In the frame loop, while recording:
recorder.recordFrame(frame)

// When you are done, print the recording as JSON:
recorder.log()
Play it back with the device:
const player = xrDevice.createActionPlayer(refSpace, JSON.parse(recordedJson))
player.play()
The player uses the recorded timestamps, so a replay on a faster or slower machine still follows the same movements. See action recording and playback in the IWER documentation.
A recording becomes a test once you compare something after the replay. Useful things to compare:
- Errors in the console. There should be none.
- The scene: which objects exist, and where they are.
- A screenshot of the last frame. Screenshots change with animation and with the graphics driver, so treat a difference as a hint and not as a failure.
Because all of this runs in an ordinary browser, it also runs in a browser without a window, on your computer or in continuous integration.
What emulation does not tell you
Be honest with yourself about this list. An emulated headset is a model of the device, not the device.
- Performance. Your computer's graphics card is not a headset's mobile chip. Frame rate has to be measured on the headset.
- Comfort. Scale, distance, reach and motion sickness are felt, not computed.
- Real tracking. Emulated hands are clean poses. Real hands are noisy, and tracking is sometimes lost.
- The real room. A synthetic room is tidy. A real one has glass, clutter and bad light.
- Browser differences. The emulator implements the standard. Each headset's browser has its own gaps and quirks.
A sensible routine is to use the emulator for every change, and a headset before you call something finished.
Doing this in Graspable
Graspable sets this up for web projects. The desktop preview includes an emulated headset, with on-screen controls and a choice of synthetic rooms for AR. There is nothing to install or configure.
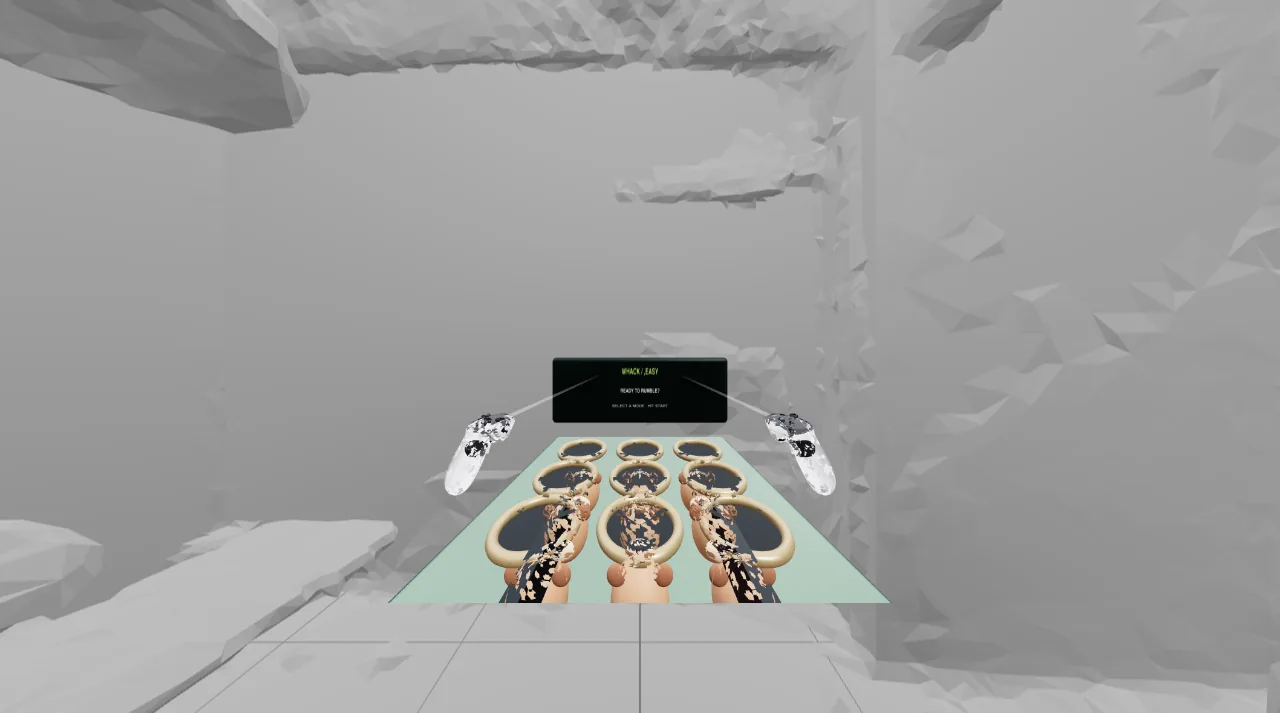
The preview has Record and replay buttons. A recording is saved in the project's tests/xr/ folder, and after each of the agent's runs Graspable replays every recording in a browser without a window and compares the scene. If something you recorded stops working, you hear about it before you put the headset on. See Preview and headset and XR tests, or read how Graspable checks its own work.
When you are ready for the real device, the preview can open the project on a headset over Wi-Fi or USB.
Sources
-
Sensors panel, Chrome DevTools
-
Immersive Web Emulation Runtime: getting started, action recording and playback, Meta
-
Immersive Web Emulator, Meta
-
WebXR Device API, W3C
-
Store options, @react-three/xr